Note: This article has been updated and expanded. Read the complete guide: How Air Duct Cleaning Works — Step by Step Guide for Houston Homeowners.
If you have never had professional air duct cleaning done, the process might seem like a mystery. What exactly happens when a technician shows up at your door? What equipment do they use? How thorough is the cleaning actually?
These are fair questions. You deserve to understand exactly what you are paying for. Here is the complete step by step breakdown of how a professional NADCA-certified air duct cleaning works from the moment the technician arrives to the final walkthrough.
Step 1: Arrival and Initial Assessment
The technician arrives and conducts a visual inspection of your HVAC system. This includes examining the accessible sections of your ductwork, checking the condition of your air filter, inspecting the evaporator coil, and assessing the blower fan and heating chamber.
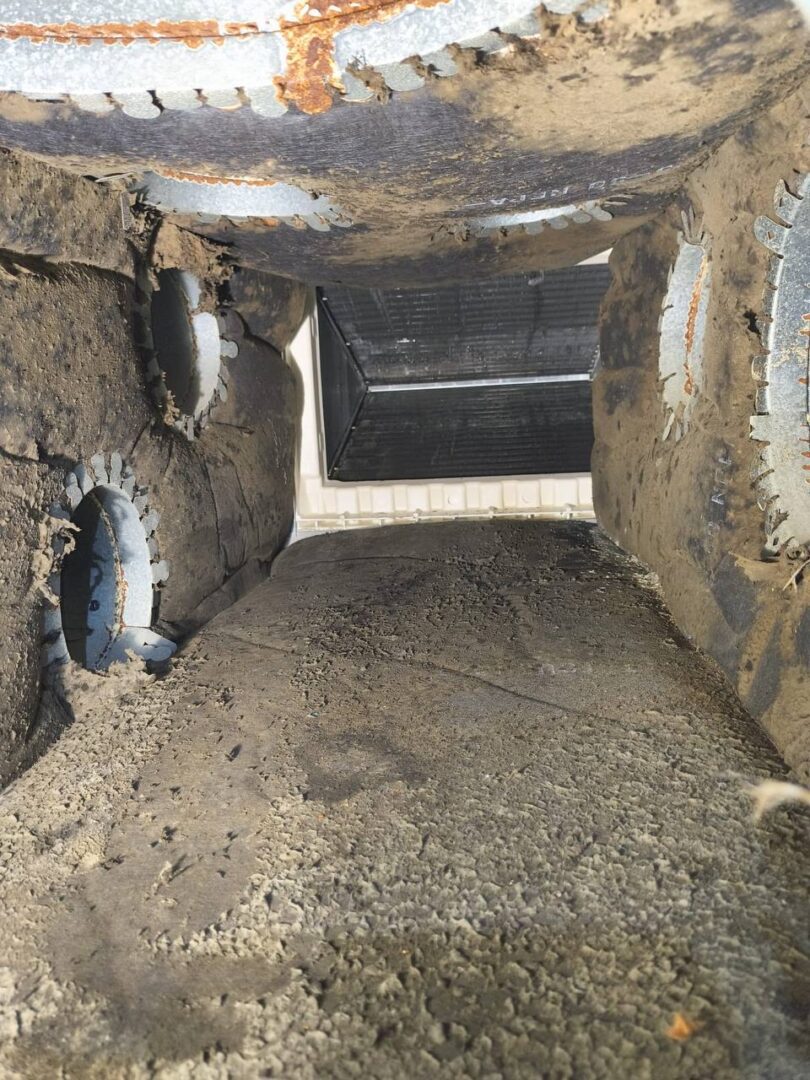
In many Houston homes, we find significant debris accumulation within the first five minutes of inspection. Pet dander, pollen, construction dust, and years of normal household debris combine to create a dense layer on the interior surfaces of ductwork, often visible through open access panels or vent registers.
This initial assessment establishes the baseline condition of your entire system. If anything unusual is found, such as disconnected ductwork, visible mold growth, or water damage, the technician will document it during this phase.
Step 2: System Preparation
Before cleaning begins, the technician seals and protects the work areas in your home. Furniture near vent registers is moved back carefully. Floor surfaces around the primary work area are covered with protective sheeting.
The HVAC thermostat is set to the OFF position to ensure the system does not turn on during the cleaning process. The technician then maps out the full system, identifying the number of supply registers, return grills, and the location of the air handler, plenum box, and evaporator coil.
Step 3: Creating Negative Air Pressure
A professional-grade negative air machine is connected to the duct system. This machine creates continuous vacuum pressure throughout all connected ductwork, pulling air toward the machine through a HEPA-filtered exhaust system.
Negative air pressure is the foundation of proper source removal cleaning. By maintaining a continuous vacuum, the system captures dislodged debris before it can recirculate through your home. Without negative pressure conditions, cleaning simply redistributes dust and debris rather than removing it.
Step 4: Agitating and Cleaning Each Supply Duct
Starting with the supply duct registers, the technician uses specialized agitation tools to dislodge debris from the interior surfaces of each supply branch. These tools reach deep into the duct system and break the bond between debris and duct surfaces.
The dislodged material is immediately captured by the negative air system and routed through HEPA filtration to the exterior of your home. This ensures that the debris is permanently removed rather than redistributed into your living space.
Each supply duct branch is cleaned individually. This is a methodical process that cannot be rushed. Our average residential cleaning service takes approximately 7 hours because we clean all eight HVAC components thoroughly.
Step 5: Cleaning Return Ducts
Return ducts are cleaned using the same agitation and extraction process. Return ducts typically accumulate heavier debris loads than supply ducts because they actively pull air and contaminants from the living space into the system.
The technician works through each return duct branch individually, ensuring complete interior surface coverage. In homes with pets or significant construction history, return ducts can accumulate several pounds of debris over a three to five year period.
Step 6: Cleaning the Evaporator Coil
The evaporator coil is one of the most critical components in your HVAC system and one of the most common sites for mold growth in Houston’s humid climate. The technician carefully cleans the coil fin surfaces to remove accumulated dirt, debris, and any visible biological growth.
Coil cleaning requires specialized techniques that do not damage the delicate fin structure while completely restoring the coil surface to a clean condition. A dirty coil reduces your air conditioner efficiency and is a primary catalyst for mold development inside the duct system.
Step 7: Cleaning the Blower Fan and Heating Chamber
The blower fan assembly is accessed and cleaned to remove debris from the fan blades, housing, and motor surface. A dirty blower fan creates airflow imbalance, increases motor strain, and reduces the overall efficiency of your system.
The heating chamber is then cleaned to remove accumulated debris, soot, and particulate matter from the heat exchange surfaces. Both components are restored to a clean baseline condition before the technician moves to the next step.
Step 8: Cleaning the Plenum Box
The plenum box is the central transition space between your duct system and the air handler. Every cubic foot of air in your HVAC system passes through the plenum box, which makes it a primary debris concentration point.
The technician removes the plenum access panel and cleans all interior surfaces to eliminate accumulated debris. This step is critical because a dirty plenum box continuously redistributes contamination to every connected duct branch.
Step 9: Cleaning Register Boxes and Grills
All supply and return register boxes are cleaned individually to remove accumulated debris from the interior surfaces. All grills and registers are removed, thoroughly washed, dried, and reinstalled. This restores proper airflow at every vent termination point and eliminates visible dirt buildup.
Clean vents also significantly improve the appearance of your home, which is especially important before a showing or home inspection.
Step 10: Final Inspection and System Test
The technician conducts a final walkthrough of all eight HVAC components. This includes verifying that each component has been cleaned to standard, checking that all access panels are properly sealed, and ensuring all vents and registers have been properly reinstalled.
The HVAC system is turned back on to verify normal operation. The technician confirms that airflow has improved and that the system is functioning correctly after the cleaning.
What Homeowners Should Expect After Cleaning
**Noticeably fresher air.** The most immediate change most homeowners report is a reduction in musty odors and the general freshness of the air throughout the home.
**Improved HVAC efficiency.** With clean coils, an unbalanced blower, and clear ductwork, your system operates more efficiently. Many homeowners notice a reduction in their monthly energy bill within the first billing cycle.
**Reduced dust on surfaces.** With the debris source inside the duct system eliminated, the rate of dust accumulation on furniture and surfaces decreases noticeably.
**Better air flow from vents.** Clean duct work means less resistance, which means stronger and more consistent airflow from every supply register in your home.
Book Your Free Inspection
If you want to understand exactly what inside your HVAC system looks like before booking a cleaning, start with a free inspection. Our NADCA certified technicians will document the current condition of all eight components and give you an honest, no-pressure assessment based on what we find.
[Book a Free Inspection](https://crm.ahchooindoorair.com/book)
AH-CHOO! Indoor Air Quality serves Houston, Austin, San Antonio, and South Louisiana. Average job time: 7 hours. 8 components cleaned. 38 years of experience.
Related: What to Expect During a Professional Air Duct Cleaning in Houston.